Help & Support Center
Knowledge Base
Find all the answers for what you need to do inside the BestBox Platform. From Email Marketing, Websites and Workflow Automations to Workout Programming, Membership Management and Class Reservations.

How to Create a Simple Calendar in Bestbox Grow
Best Box Simple Calendar is a powerful all-in-one marketing platform that can be used to manage your business’s CRM, marketing, and automation needs. One of the useful features is its calendar, which can help you keep track of appointments, events, and tasks. This guide will walk you through creating a simple calendar in Bestbox.
Step 1: Log In to Your Account
Open your preferred web browser.
Go to the Bestbox login page.
Enter your credentials and click the “Log In” button.
Step 2: Access the Calendar Feature
Once logged in, navigate to the “Calendars” section. This can typically be found in the sidebar menu.
Click on “Calendars” to open the calendar management page.
Step 3: Create a Calendar
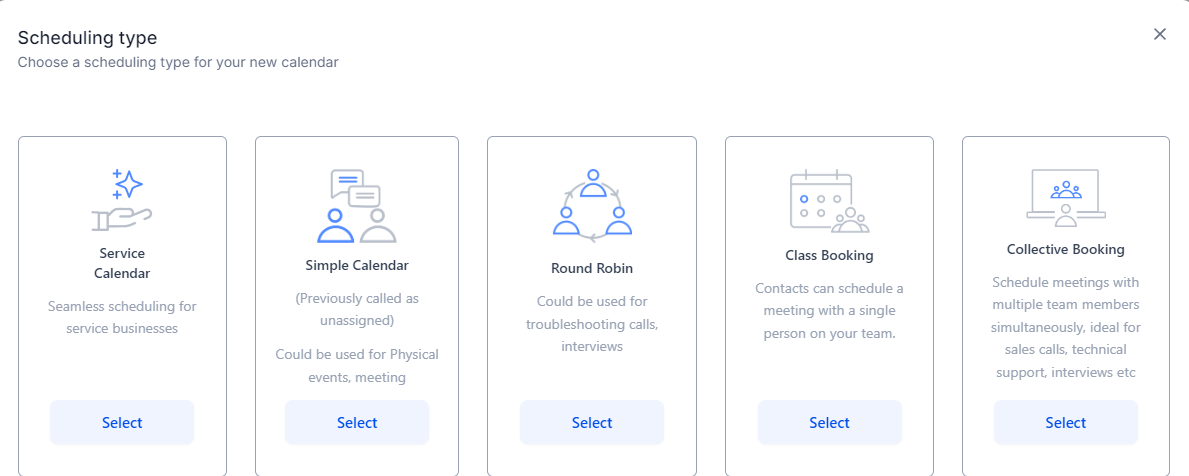
On the Calendars page, look for a button or link that says “Create Calendar” This is usually located at the top right corner of the page.
Click Simple Calendar

Step 4: Configure Calendar Settings
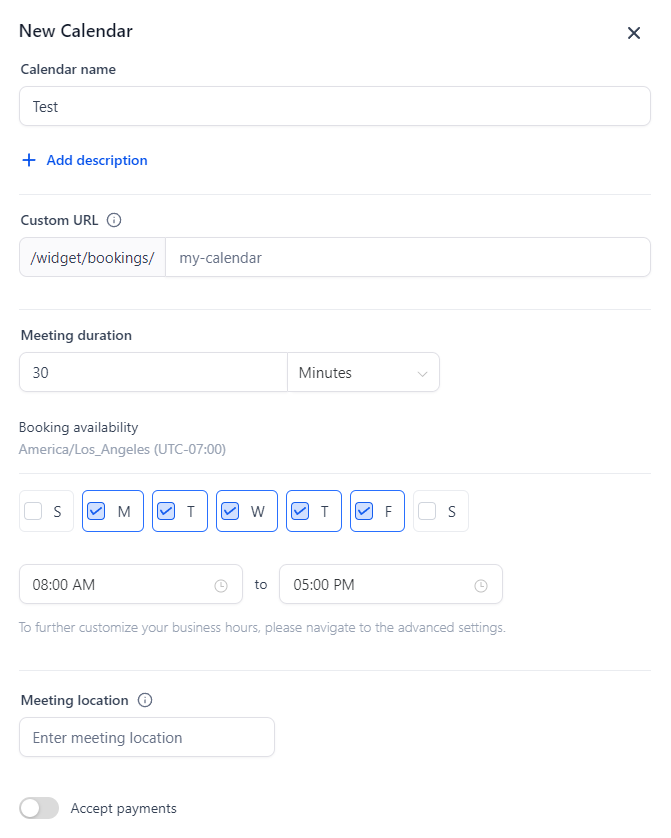
Calendar Name: Enter a name for your calendar in the provided field. This could be something descriptive like "Team Meetings" or "Client Appointments".
Description (Optional): Add a brief description of the calendar’s purpose or any additional details that might be useful.
Time Zone: Select the appropriate time zone for the calendar. This is important for ensuring that all events and appointments are displayed correctly based on your local time.
Availability Settings: Configure the availability settings if needed. This could include specifying working hours or setting up any specific rules for when appointments can be booked.

Step 5: Customize Calendar Appearance
Color Coding (Optional): Some calendar tools allow you to use color coding for different types of events or appointments. Check if this feature is available and set colors accordingly to easily differentiate between different types of entries.
Event Categories: If applicable, set up different categories for your events. This can help you organize and filter events more effectively.
Step 6: Save Your Calendar
After configuring all necessary settings, look for a “Save” or “Create” button at the bottom or top of the page.
Click this button to save your new calendar.
Step 7: Add Events to Your Calendar
Go back to the calendar view.
To add a new event, click on the date and time slot where you want the event to be scheduled.
Enter the details for the event, such as the title, description, location, and time.
Save the event by clicking on the “Save” or “Add Event” button.

Step 8: View and Manage Your Calendar
You can view your calendar in different formats, such as daily, weekly, or monthly views.
To manage events, click on any event to edit or delete it.
Tips for Using Your Calendar Effectively
Regular Updates: Regularly update your calendar to reflect any changes or new appointments.
Notifications: Enable notifications if you need reminders for upcoming events.
Integration: Explore integrations with other tools you use to ensure seamless management of your calendar and tasks.
If you encounter any issues or have specific questions about using the Simple calendar feature in BestBox Grow, refer to the BestBox support resources or contact our support team for assistance.

Lorem ipsum dolor sit amet, consectetur adipiscing elit. In iaculis egestas lacus. Aliquam cursus
Navigation
© 2023 BestBox - All Rights Reserved.


